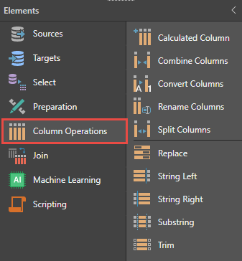
Column Operations
Edit the columns within tables.
Execute a script to generate an additional column based on a calculation. To create a calculated column, execute a PQL script in the Script window. With the Calculated Column node selected, enter the script you want to run, then enter a name for the new column. Finally, select the output type from the Calculated Column Type menu.
To test the script, click the  button in the Preview panel.
In the example below, a PQL script has been executed to generate a new column containing both first and last names. The new Full Name column is added to the table, and the original separate columns also remain in the table.
For more information, see Calculated Columns.

Combine multiple columns into a single column. This is useful if you have 2 or more columns that you want to place within a single column. This might be title, first name, and last name, or street number and street name, for instance. Instead of keeping this information in separate columns, you can easily combine it into one column, making it easier to add this data to queries later on.
With the Combined Columns node selected, go to the Properties panel and select which columns to combine. Then choose the separator, and name the new column. To remove the original columns, deselect Keep Combined Columns.

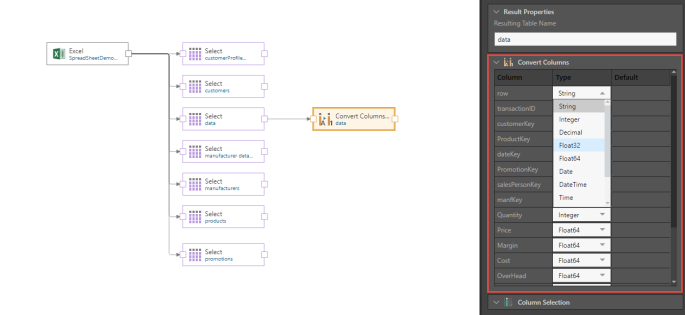
Convert a column from its current type to a new type. Click here for more information.
Columns appear in other areas of the application according to the column names set in Model. By default, columns are named according to the column names in the data source. To edit column names, add the Rename Columns to the relevant table, and rename the columns as required. To undo edits, click Reset All.

By default, columns are arranged according to their natural order (their order in the source database). This is also the order in which they will appear later on in the other application modules. However, the column order can be changed using Reorder Columns. Connect the Reorder Columns node to the appropriate table. Under Reorder Columns in the Properties panel, select the relevant column and toggle the arrows to move it.
You can reorder multiple columns from the same node. Use the Preview panel to see your selections.

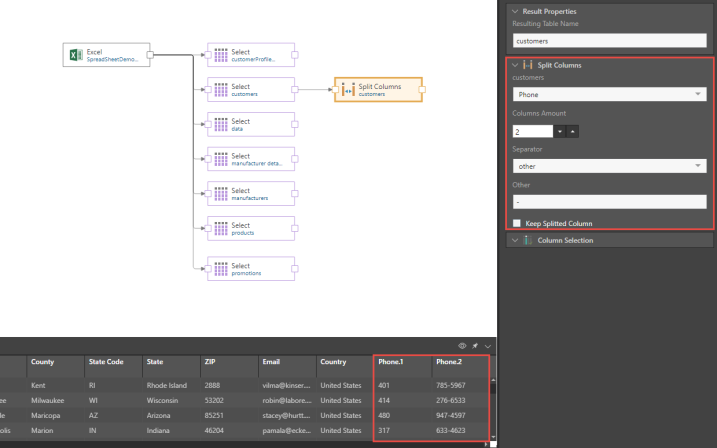
Take a single column and divide it into multiple columns. For instance, split area code and phone number into two individual columns, or split email name and email provider into two columns.
With the Split Columns node selected, choose the column you want to split from the Properties panel. Then define how many columns you want, and the choose the separator (corresponding to the separator in the column). To remove the original column, deselect Keep Split Column. In the screenshot below, the Phone column has been split into two, based on the - separator, so that the area code is split into a separate column.
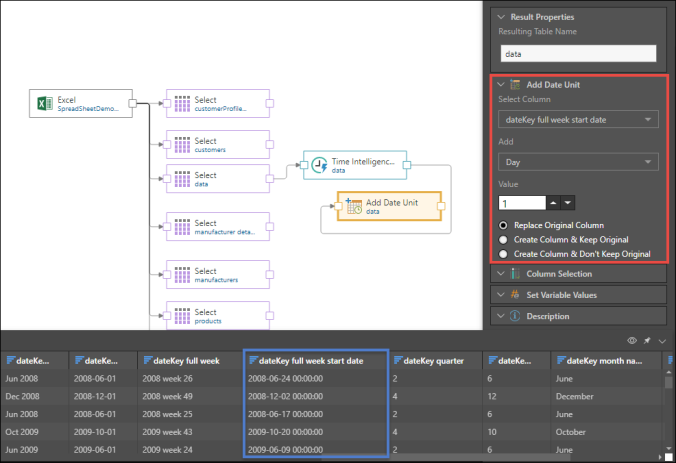
The Add Date Unit allows users to build new columns according to specific time periods, based on existing date columns.
In the example below, the Add Date Unit node was connected to the Time Intelligence node. It was then used to create a new 'full week start date' column, with the start date of each week delayed by 1 day (red highlight below). This column then replaced the original column in the table (blue highlight).
To add a date unit column:
- Connect the Add Date Unit node to a table containing a dates column, or to an Add Date/Time node.
- From the Properties panel, select the relevant date column. Next, select the unit of time you want to add to (year, quarter, month, week, or day).
- Under Value, toggle the arrows to select a value representing the number of time periods that should be added. To select past time periods, use negative numbers; for example, to select a period of 10 years ago, the user would select Year, and then -10.
- Next, choose whether to:
- Replace the original column with the new one
- Keep both the new and the original columns
- Create the new column and don't keep the original; the original column will be removed, and the new column added to the end of the table
- Next, enter the name of the new column, and determine whether or not to keep the original date column.
Use the Replace function to replace a specific character or string within a column with a different character or string. This could be used to hide private information, or to replace symbols in the column, for instance. For example, in the screenshot below, the hyphens in the Phone column have been replaced with spaces.
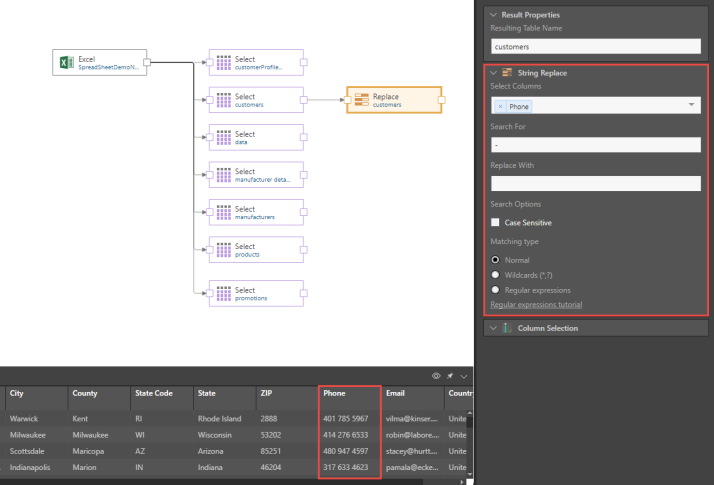
By default, the Matching type is set to Normal, but you can select the Wildcards option to use wildcards to replace single or multiple characters. For example:
|
Source |
Search |
Replace With |
Result |
|
ZAAABCD |
A*BC |
R |
ZRD |
|
ZAXXBCD |
A*BC |
R |
ZRD |
|
ZAAABCD |
A?B |
R |
ZAARCD |
|
ZAAXBCD |
A?B |
R |
ZAARCD |
You can also use regex by selecting the Regular expressions option. For details about using regular expressions, click here.
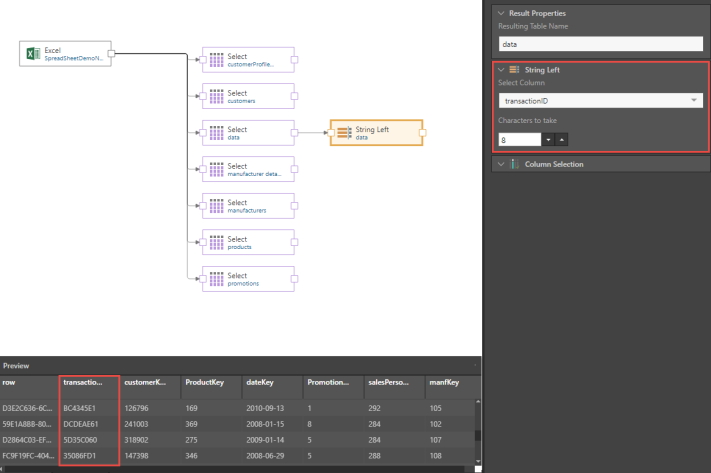
Include only part of a string, from the left-hand side, and exclude the remainder of the string. This is useful if part of the string is private, or not relevant, for instance. In the screenshot below, only the first 8 characters in the string in the Transaction ID column have been included.
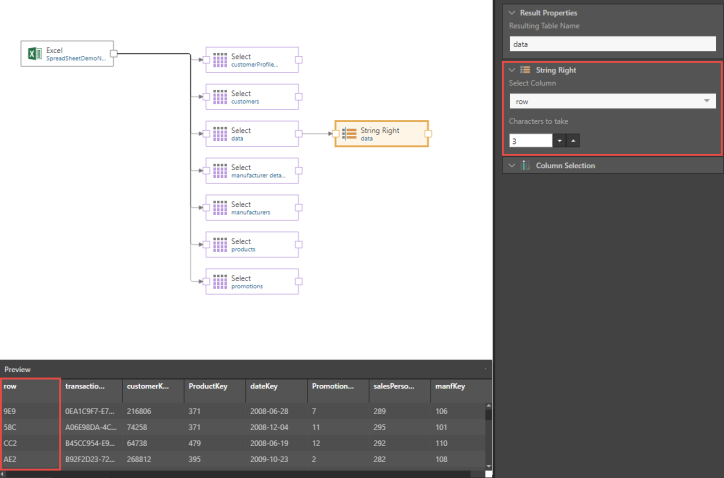
Similar to Left String, use this node to include only part of a string, from the right-hand side. In the following screenshot, the Row column has been edited to include only the final 3 characters in the string.
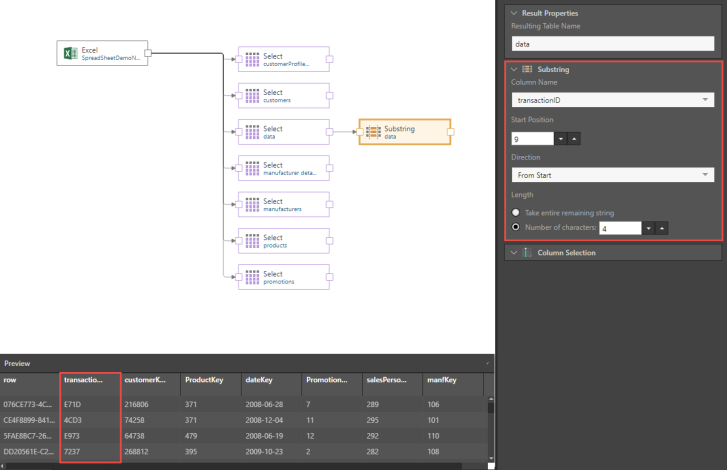
Similar to Left String and Right String, use Substring to select part of a string to include in a column. In the screenshot below, a substring of four characters was selected from the Transaction ID column.
In the Properties panel, choose the relevant column, and then the start position and the start direction - the last character to exclude, moving from left to right to left (From Start), or from right to left (From End). Next, select how many characters to include: this can be the entire remaining string, or a specified number of characters.
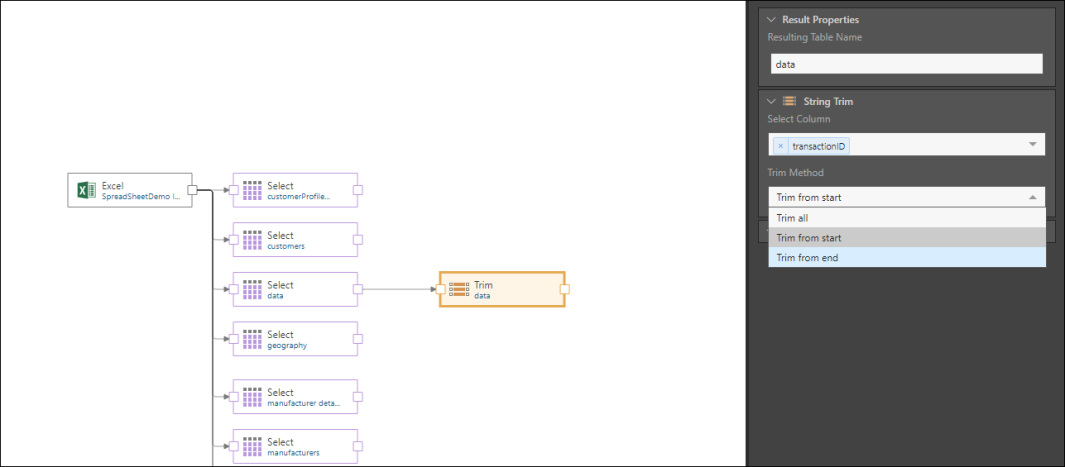
Remove spaces from the start or end of a string. This is useful if the column contains spaces that shouldn't appear in the data model.
Use the Aggregation Function node to change a column's aggregation in the schema of the source database. Column aggregation can be edited later on in Data Model, but this type of aggregation is used only in the querying process, and is not part of the underlying database.
Connect the Aggregation Function node, and in the Properties panel select the column(s) that should be aggregated, the type of aggregation (sum, average, minimum, or maximum), and the name of the new aggregated column. Uncheck the Keep Original Column option if you don't want to include the original columns(s) in the table.

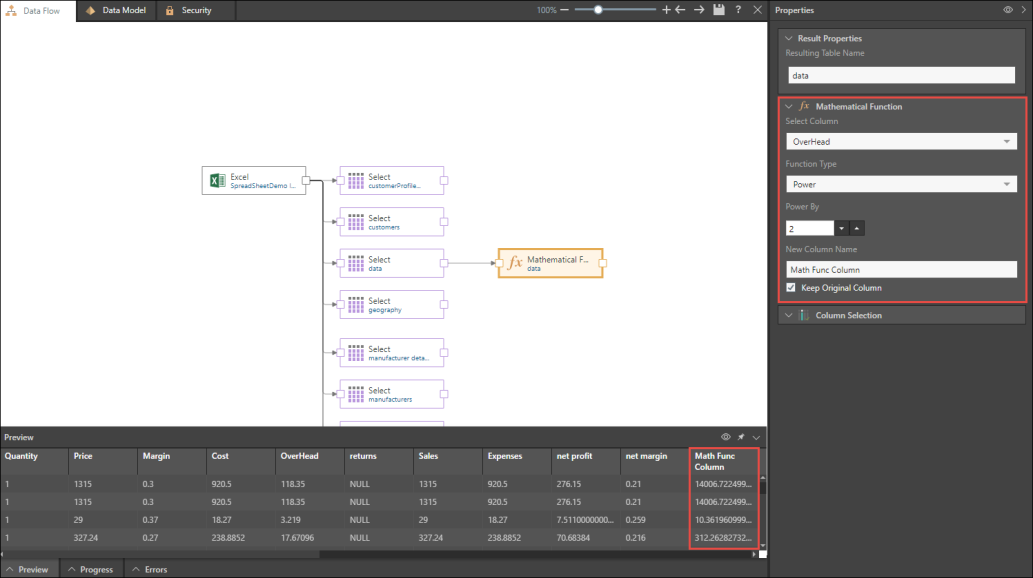
Use the Mathematical Function node to create a new column based on a mathematical function.
After connecting the Mathematical Function node, specify which column you want to apply the mathematical function to. Next, select the type of mathematical function, and enter a name for the new column. Choose whether or not to keep the original column in the table.
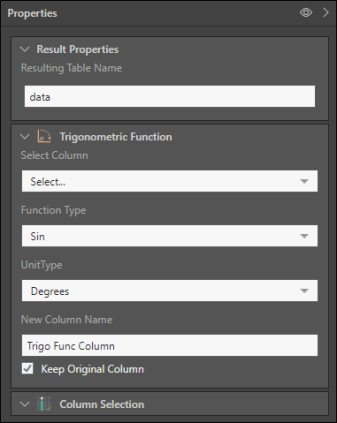
To generate a new column based on a trigonometric function, select the relevant column, and then select the function type.
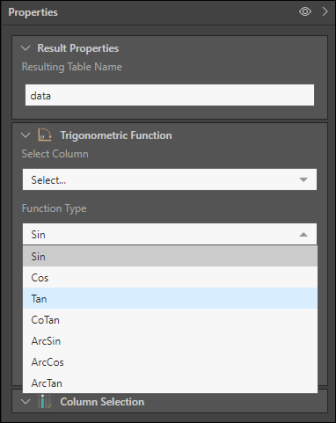
Under Unit Type, choose between degrees and radians, and then name the new column. Lastly, select whether or not to keep the original column.
